Enroll in a Class
Most students can enroll, or register, for classes in ctcLink on their own. This page provides instructions on how to enroll in ctcLink, both HCX and classic versions. For more information about registering for classes, navigating the Student Center, understanding class search and enrollment tools, and planning for upcoming quarters, contact the registration or advising office at your college.
- North Seattle Registration | North Seattle Academic Advising
- Seattle Central Registration | Seattle Central Academic Advising
- South Seattle Registration | South Seattle Academic Advising
Before you start:
- Check the Academic Calendar to see when registration begins each quarter. Approved veterans, military, and dependents may be eligible for early registration, usually the Friday before registration for current students begins. Contact your Veterans Affairs & Benefits Specialist for more information.
- Confirm your enrollment date before registration opens. Current students may register anytime on or after their enrollment appointment date. New students do not have an assigned enrollment appointment and enroll during the new student registration period. See the Academic Calendar for the new student registration date.
- Refer to the class schedule information for each college: North | Central | South. We've developed a list of important tips that will help you get the most out of ctcLink when registering for classes.
- You must be logged in to enroll in a class or add a class to your shopping cart or planner. Do I really need a permission number for every class? No, not for every class.
- Make sure to select the appropriate academic term.
- Remember to include Common Course Numbered (CCN) classes in your search.
- Enroll in classes that meet your degree requirements.
- Your search layout depends on the size of your screen.
Guides
- Log in to ctcLink from the Class Schedule (the login icon is at the bottom left).
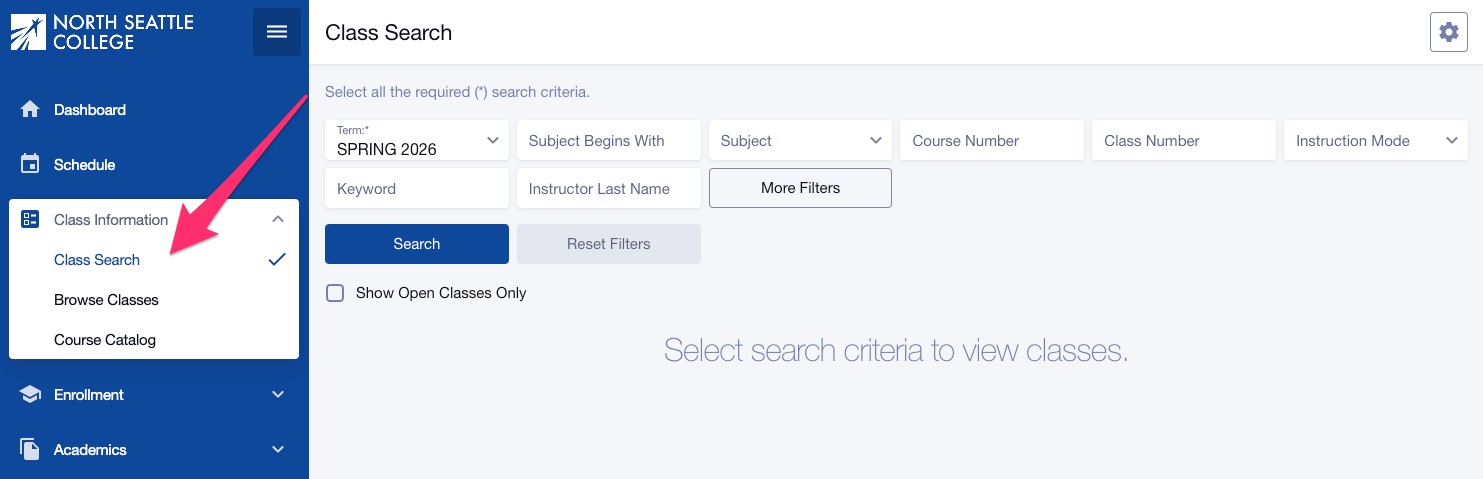
- Click Class Information in the left navigation menu.
- Select Class Search to search for a class by Term, Subject, Keyword, Class Number, Instructor Last Name, Time, Days, Instruction Mode, and other many other criteria. Click More Filters to see all available filters.
- Use the "Subject Begins with" filter and type in the two-to-five character subject to see ALL classes for subjects that have Common Course Numbering (CCN) and non-CCN courses. Find more information about Common Course Numbering.
- Students can search for classes with textbook costs of less than $50 (Low-Cost Textbooks), or classes using free, no cost, Open Educational Resources (OER: No Textbook to Purchase). To find these classes, select these options in both the Course Attribute and Course Attribute Value filters: Low-Cost Textbooks and OER: No Textbook to Purchase.
- Check the Show Open Classes Only box to show classes that still have seats open. Don't check this box if you want to be able to add yourself to a class Waitlist.
- Once you've set all your filters, click Search.
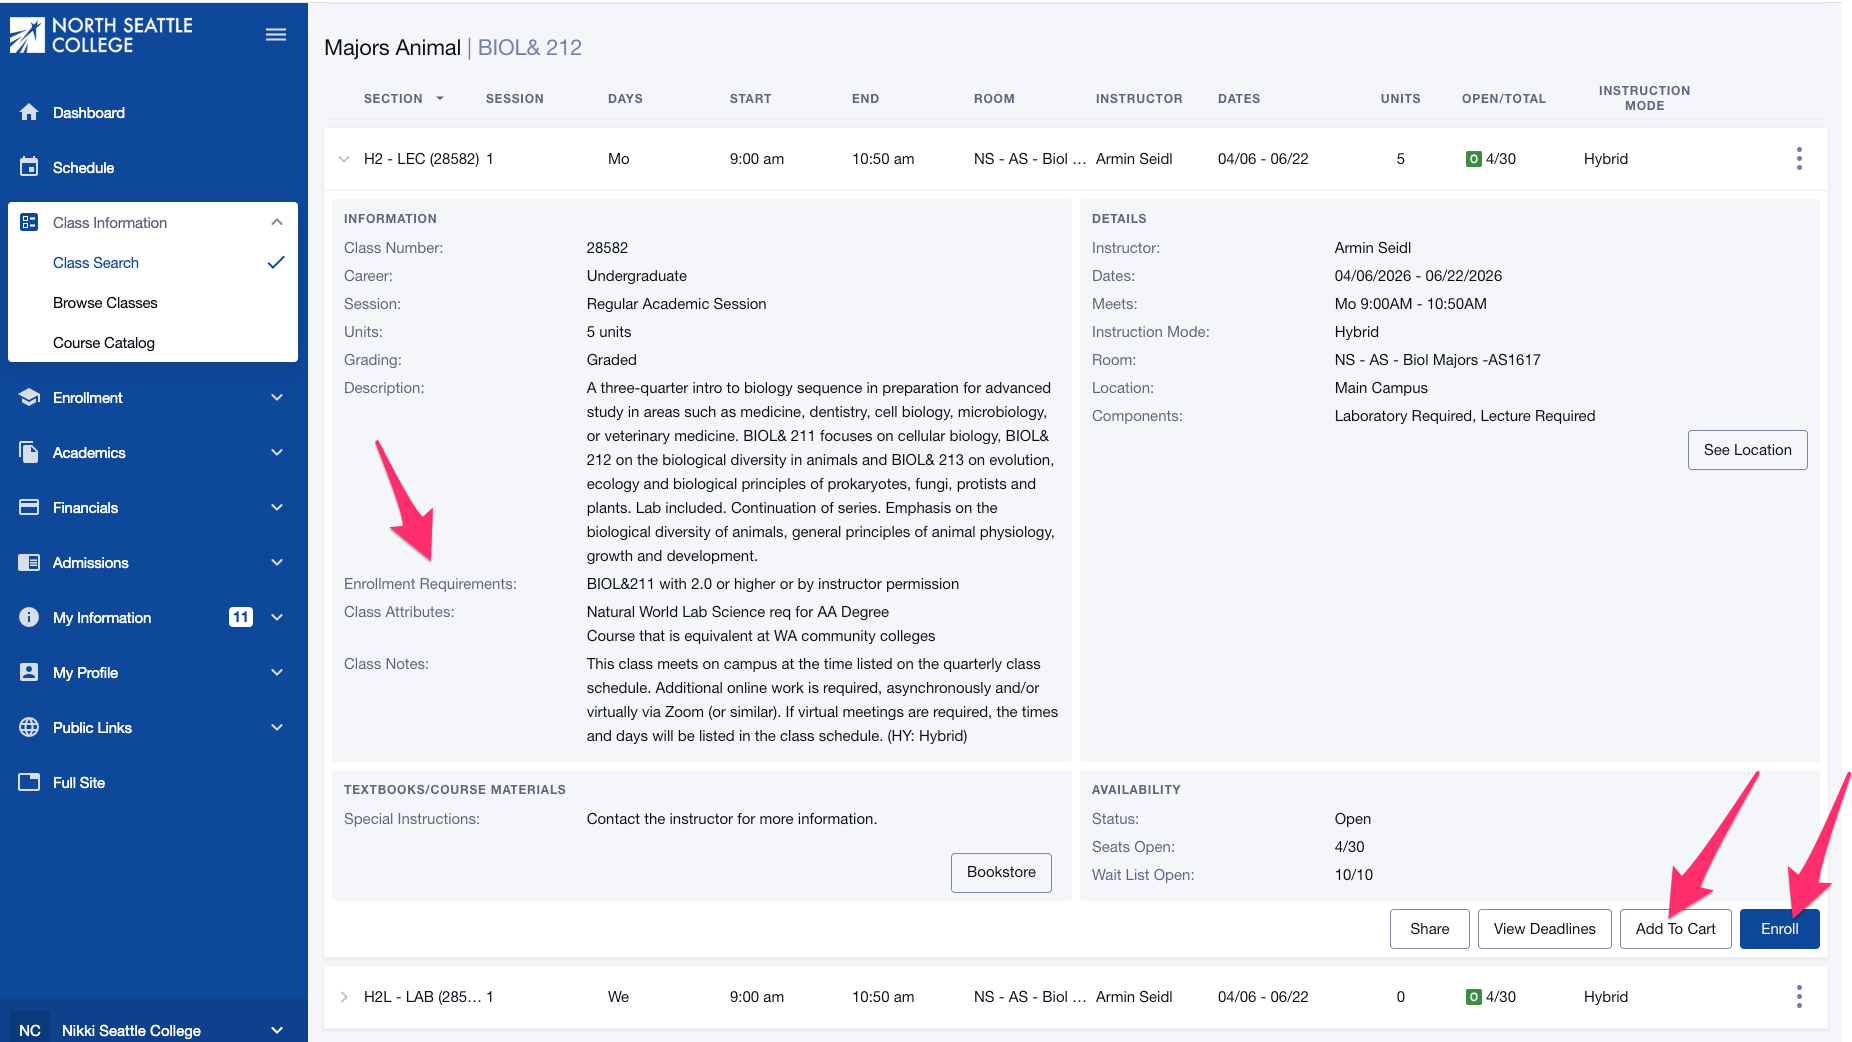
- Review the course/class options. Pay attention to the Section name: LEC = lecture, LAB = Laboratory/Studio.
- Click on the class section to see important information, including special registration instructions, prerequisites (enrollment requirements), class notes, and textbook information.
- Pay special attention to the Enrollment Requirements section, which will list general prerequisites for the course and any specific requirements for the specific section. Some classes require you to enroll in two courses at the same time, so you must add both to your Shopping Cart (click Add to Cart) and then enroll from your Shopping Cart.
- If you would like to enroll in the class now, click Enroll. You can also click Add to Cart to enroll in all your selected classes at the same time from your Shopping Cart.
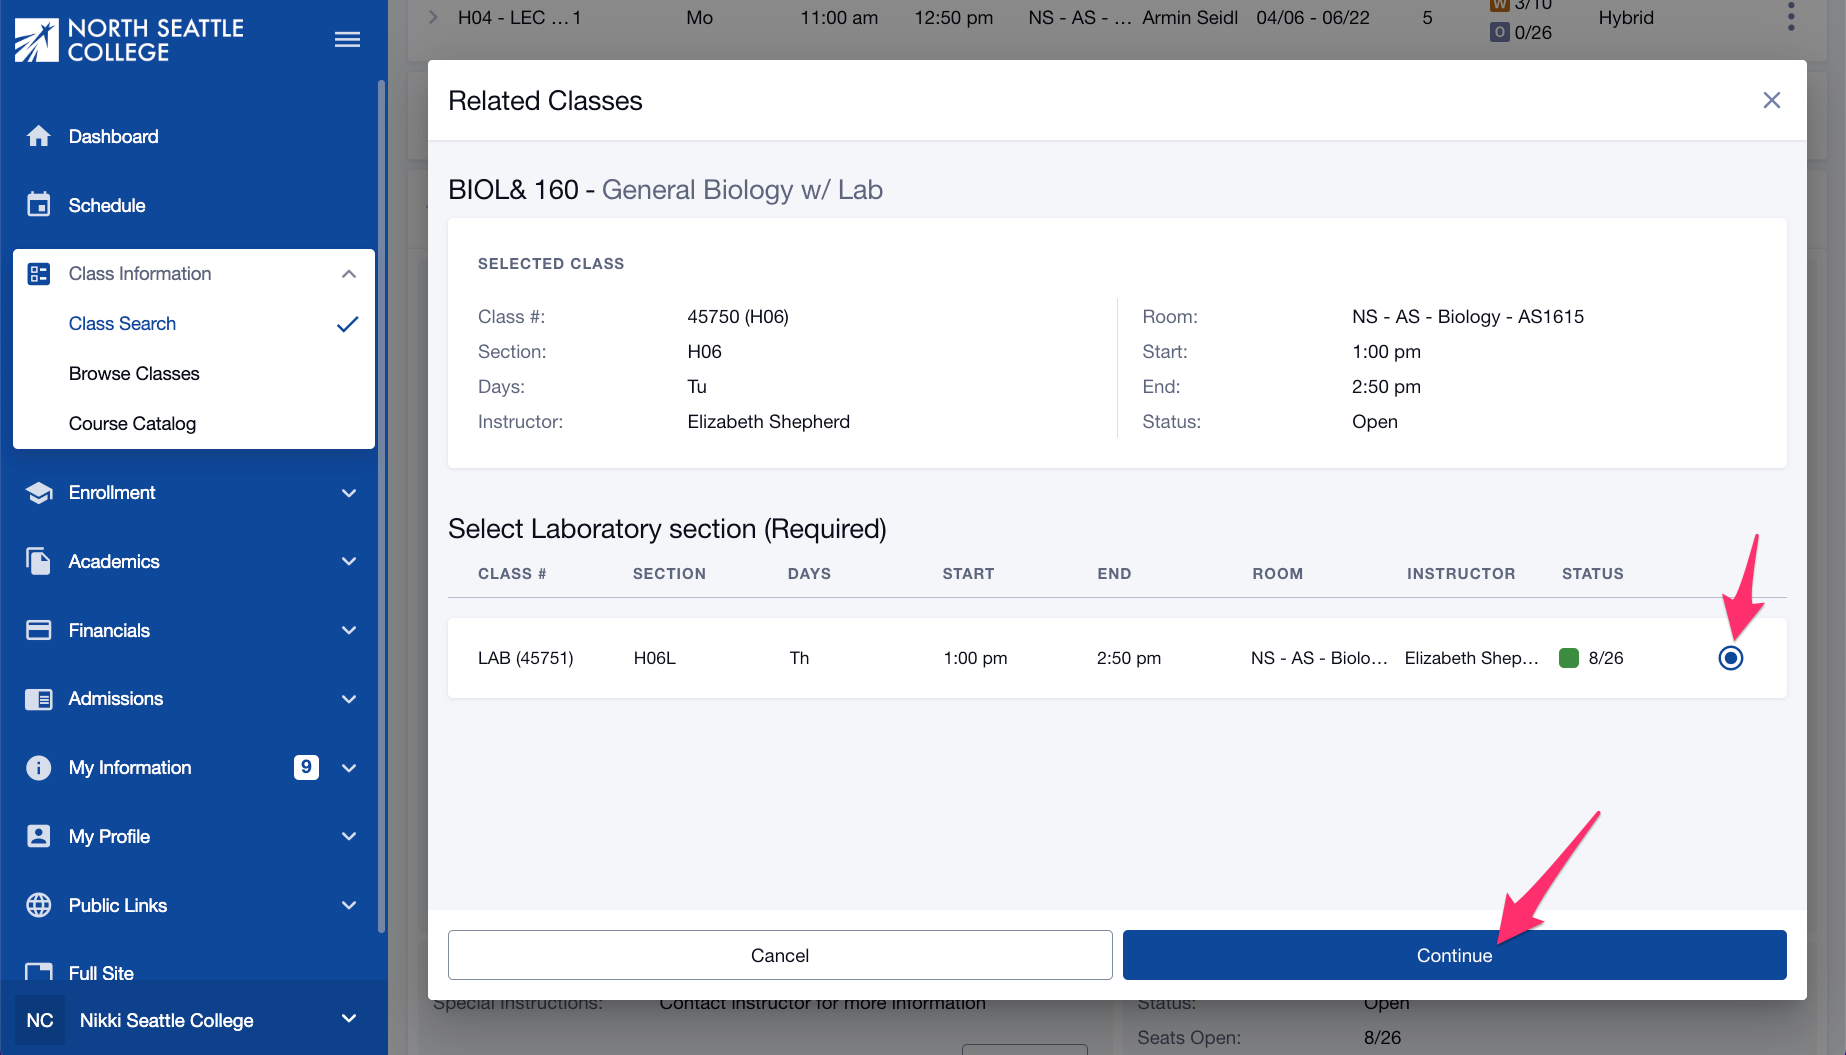
- Once you click Enroll (from this page or the Shopping Cart), you may be prompted to choose a Lab/Studio section. If so, check the option button next to your preferred Lab/Studio section and click Continue.
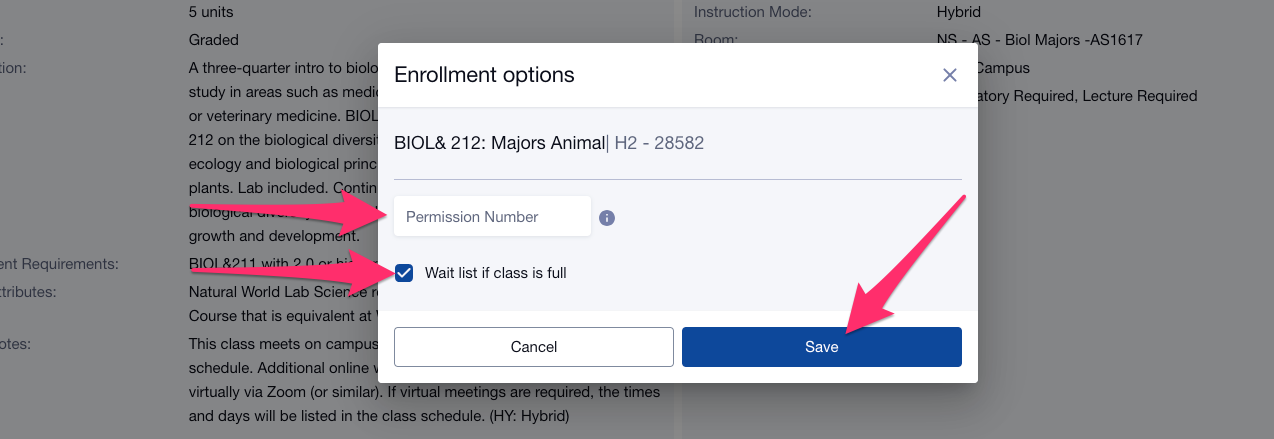
- In the Enrollment Options pop-up page, enter a permission number if you need one, check the Waitlist if class is full box if you're trying to add yourself to a waitlist. Note that the permission number box is there by default. If you're not sure if you need one, just move to the next step. The system will alert you if a permission number is needed.
- Click Save.
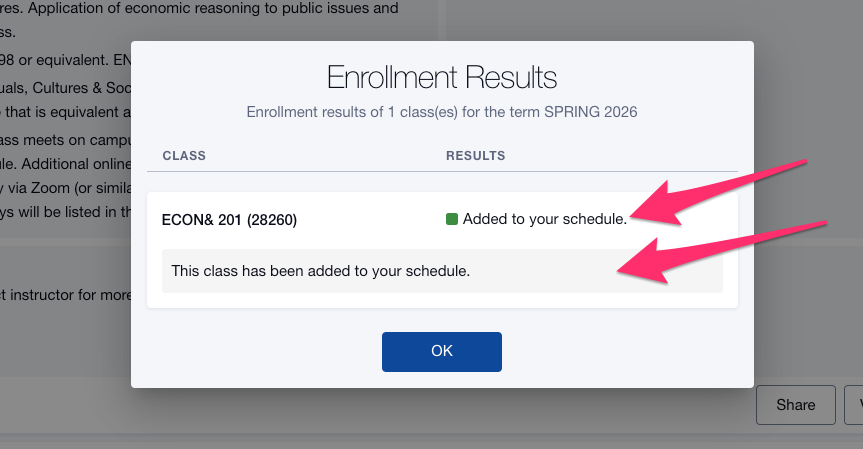
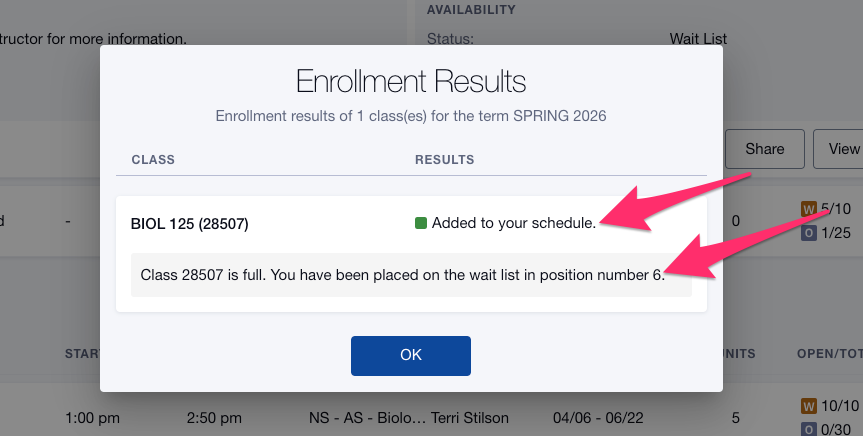
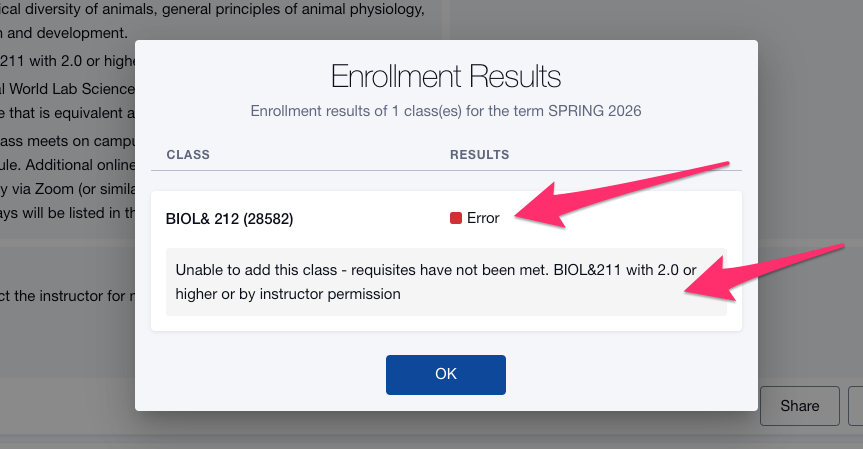
- The Enrollment Results pop-up page tells you whether or not you were enrolled in the class, waitlisted (with your waitlist position), or were unable to enroll. If you were unable to enroll, review the additional information below the error message.
- Click Ok.
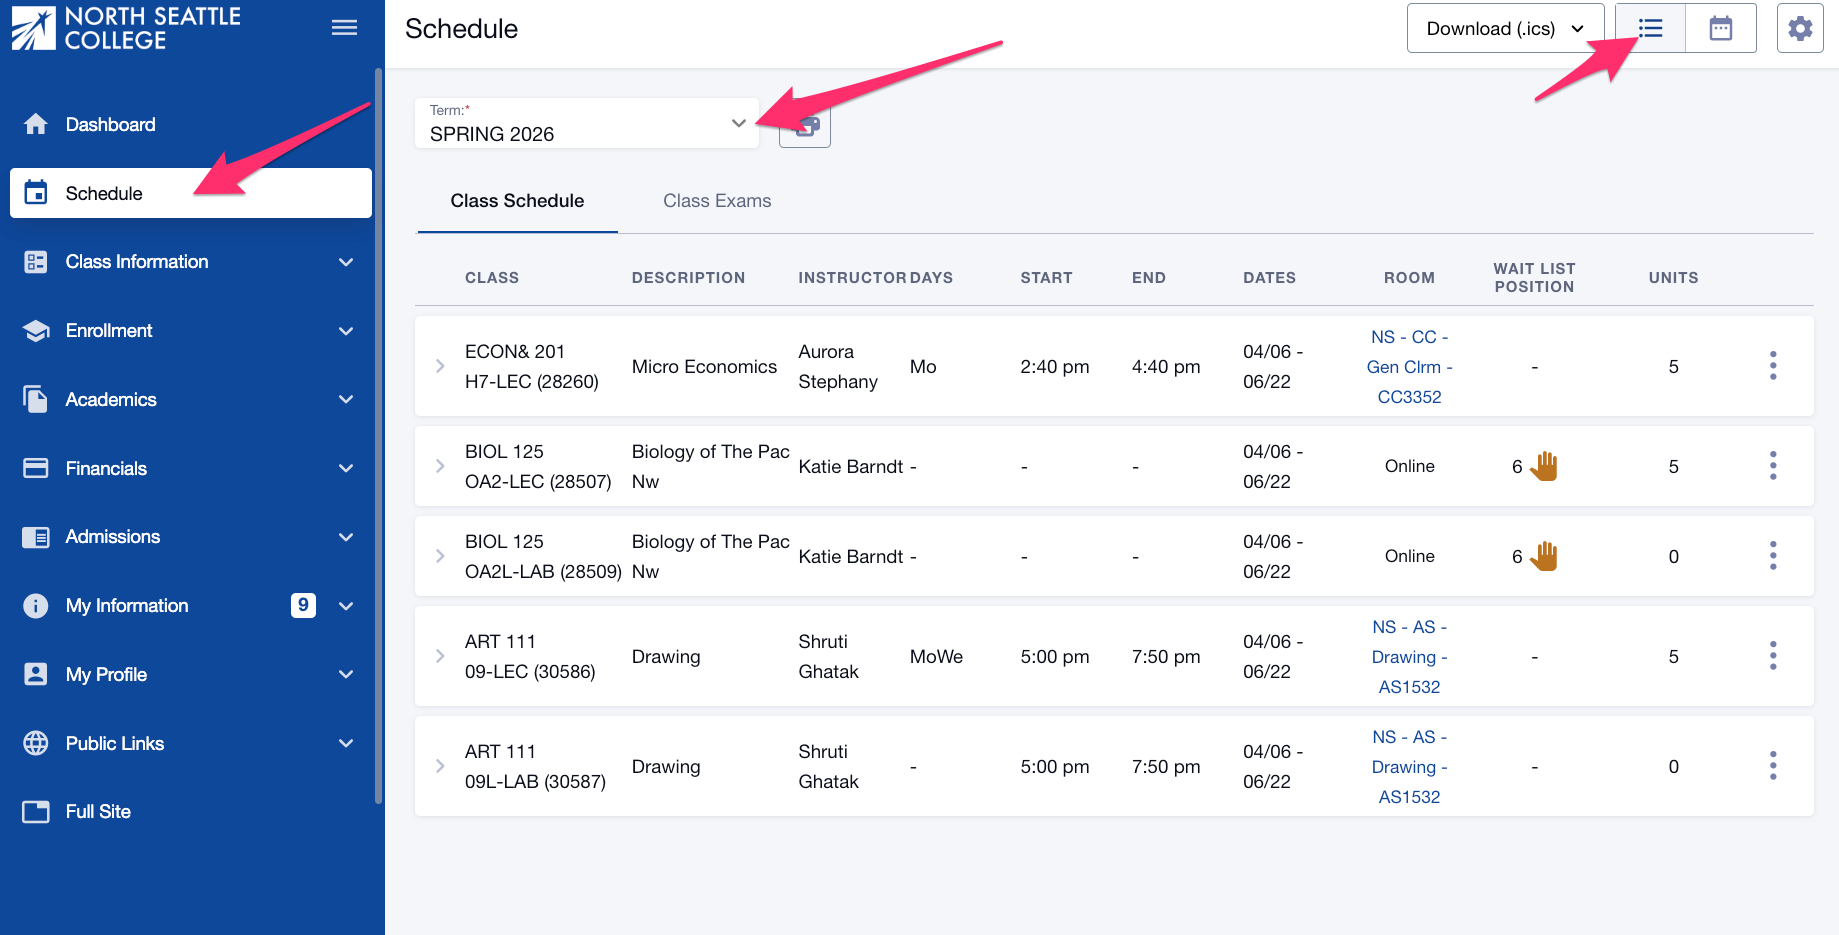
To see all the classes on your schedule, including Waitlisted classes and your waitlist position, select Schedule from the left navigation menu and choose List View from the view options at the top of the page.
Review the ctcLink Reference Center for these related topics:
- Drop/Withdraw from a Class
- Enroll from Shopping Cart
- Join a Class Waitlist and Select your Back-up Class (Swap)
- Log in to ctcLink on a desktop computer.
- If you are or have been a student at more than one WA state community or technical college, choose the college at which you would like to enroll.
- Click Student Homepage.
- Click the Manage Classes tile.
![]()
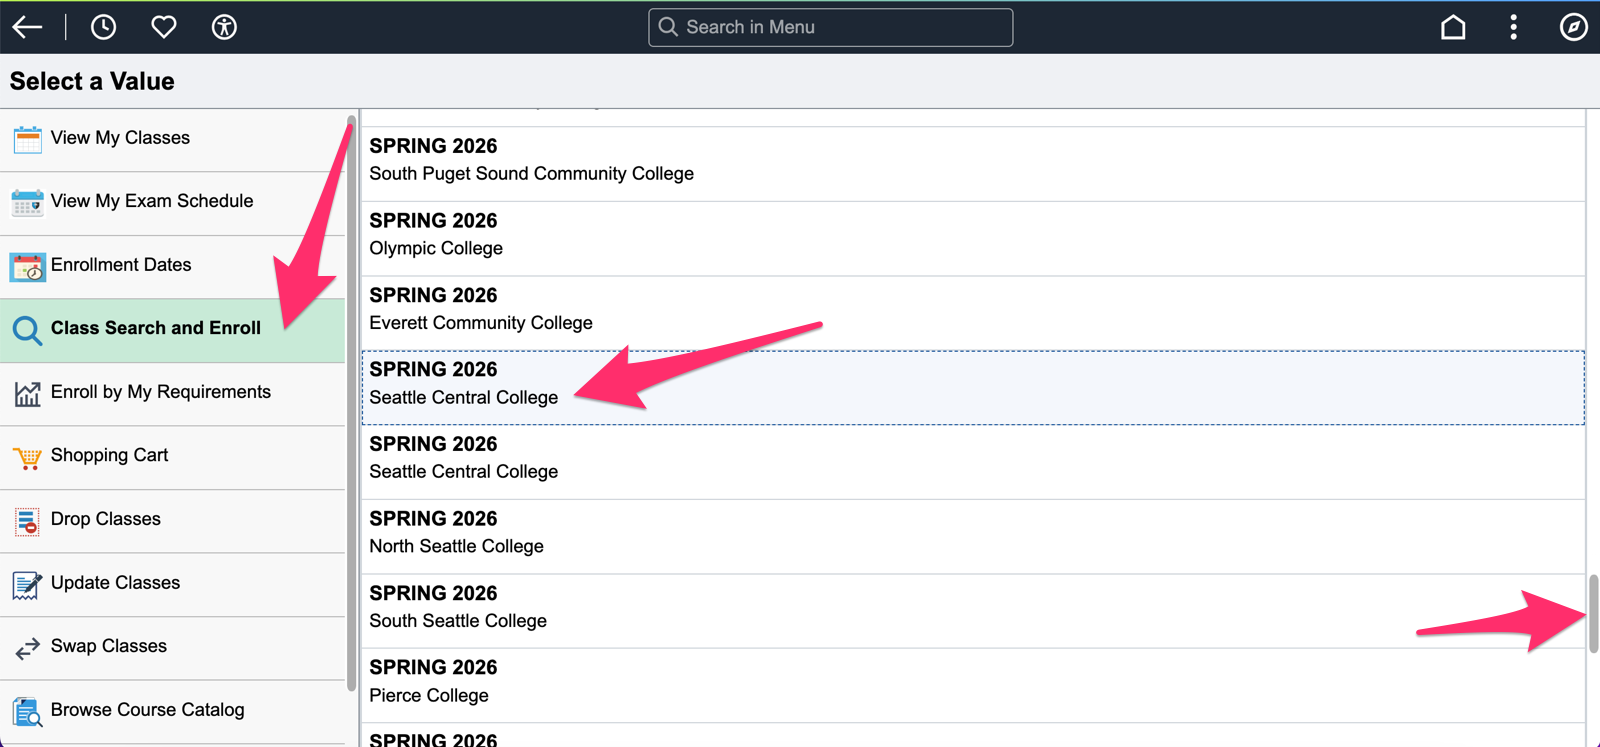
- Click Class Search and Enroll from the left navigation menu.
- Choose the Term and College. You will need scroll.
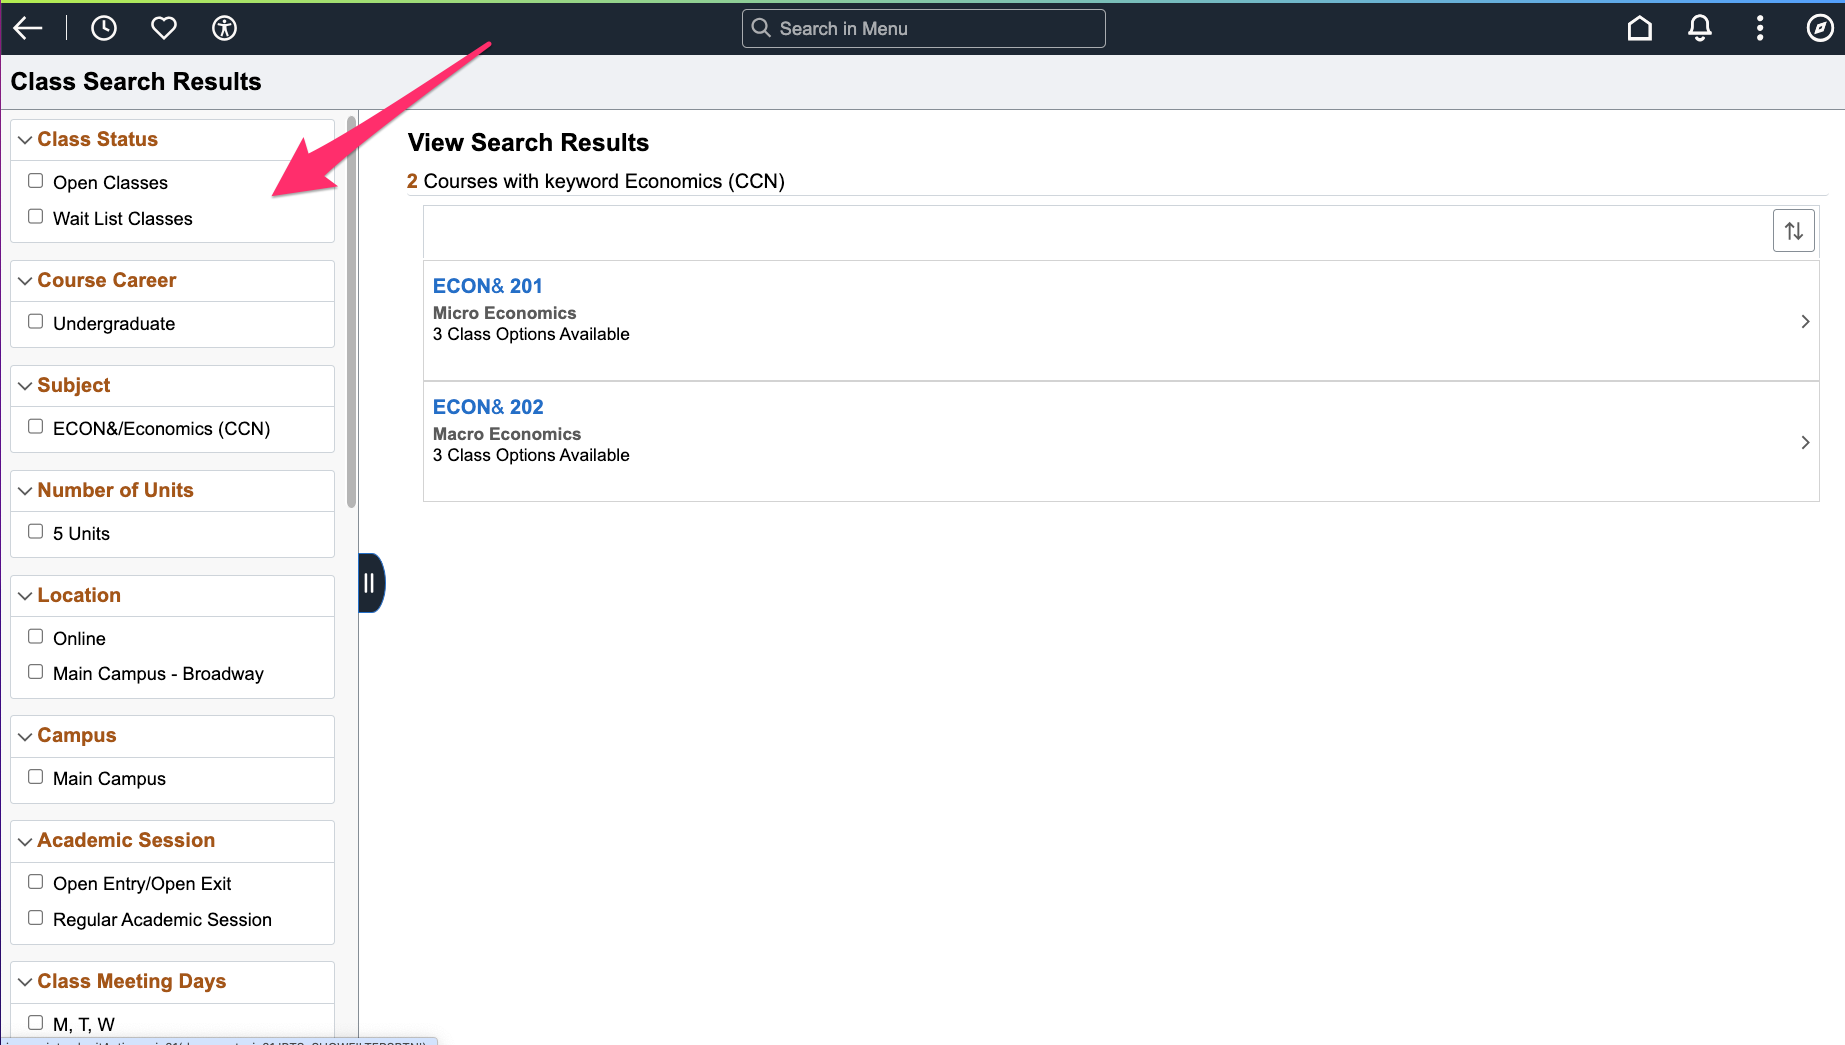
- Use the Keyword Search or use Additional ways to search option.
- Use the additional filters on the left to narrow your search as needed, then click on the course to show the available classes.
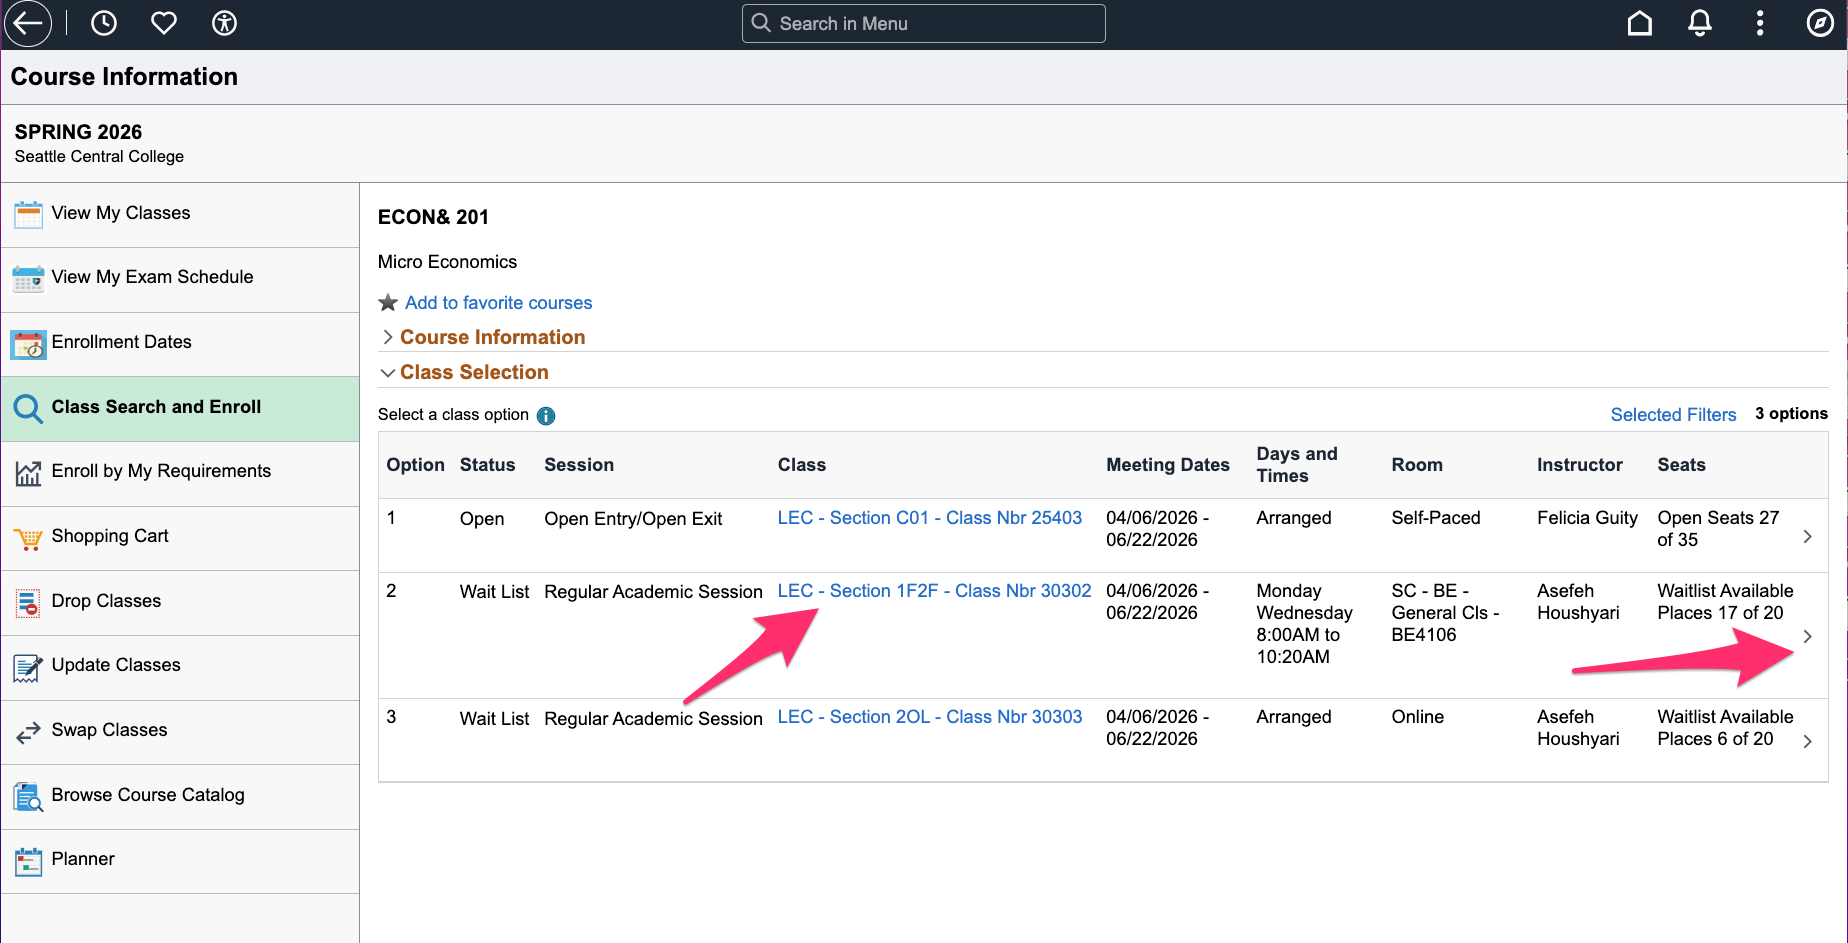
- Use the class hyperlinks to view additional class details and information.
- Once you've decided which class best fits your schedule, click the arrow on the right of the class section to start the enrollment steps.
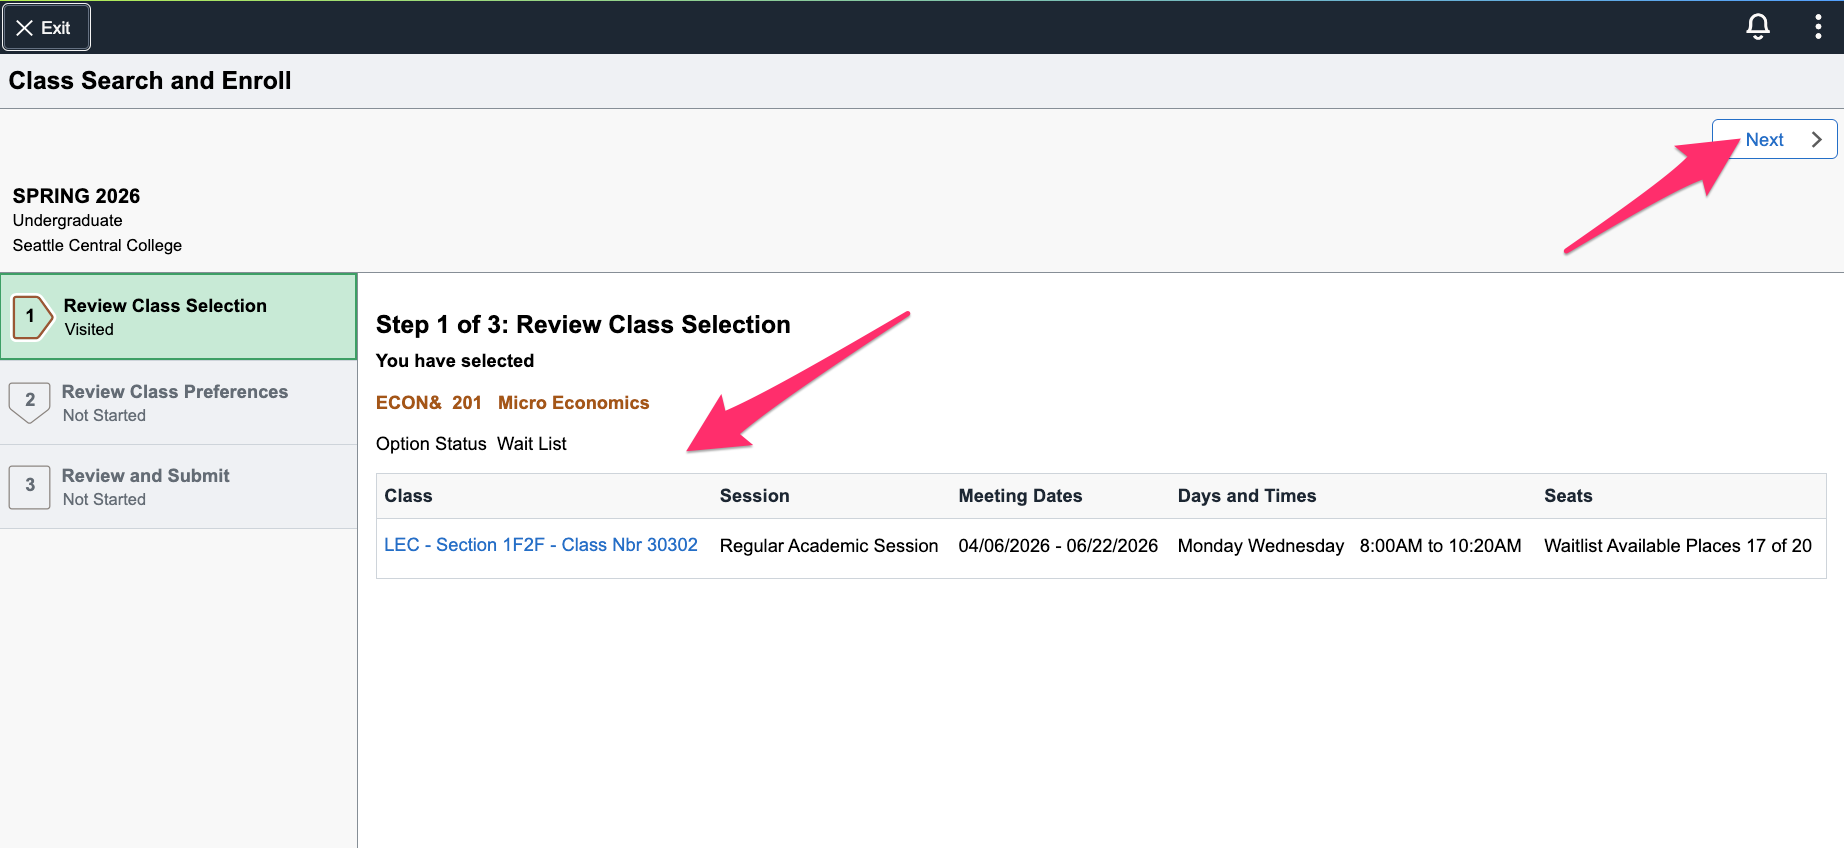
Review your class selection and click Next.
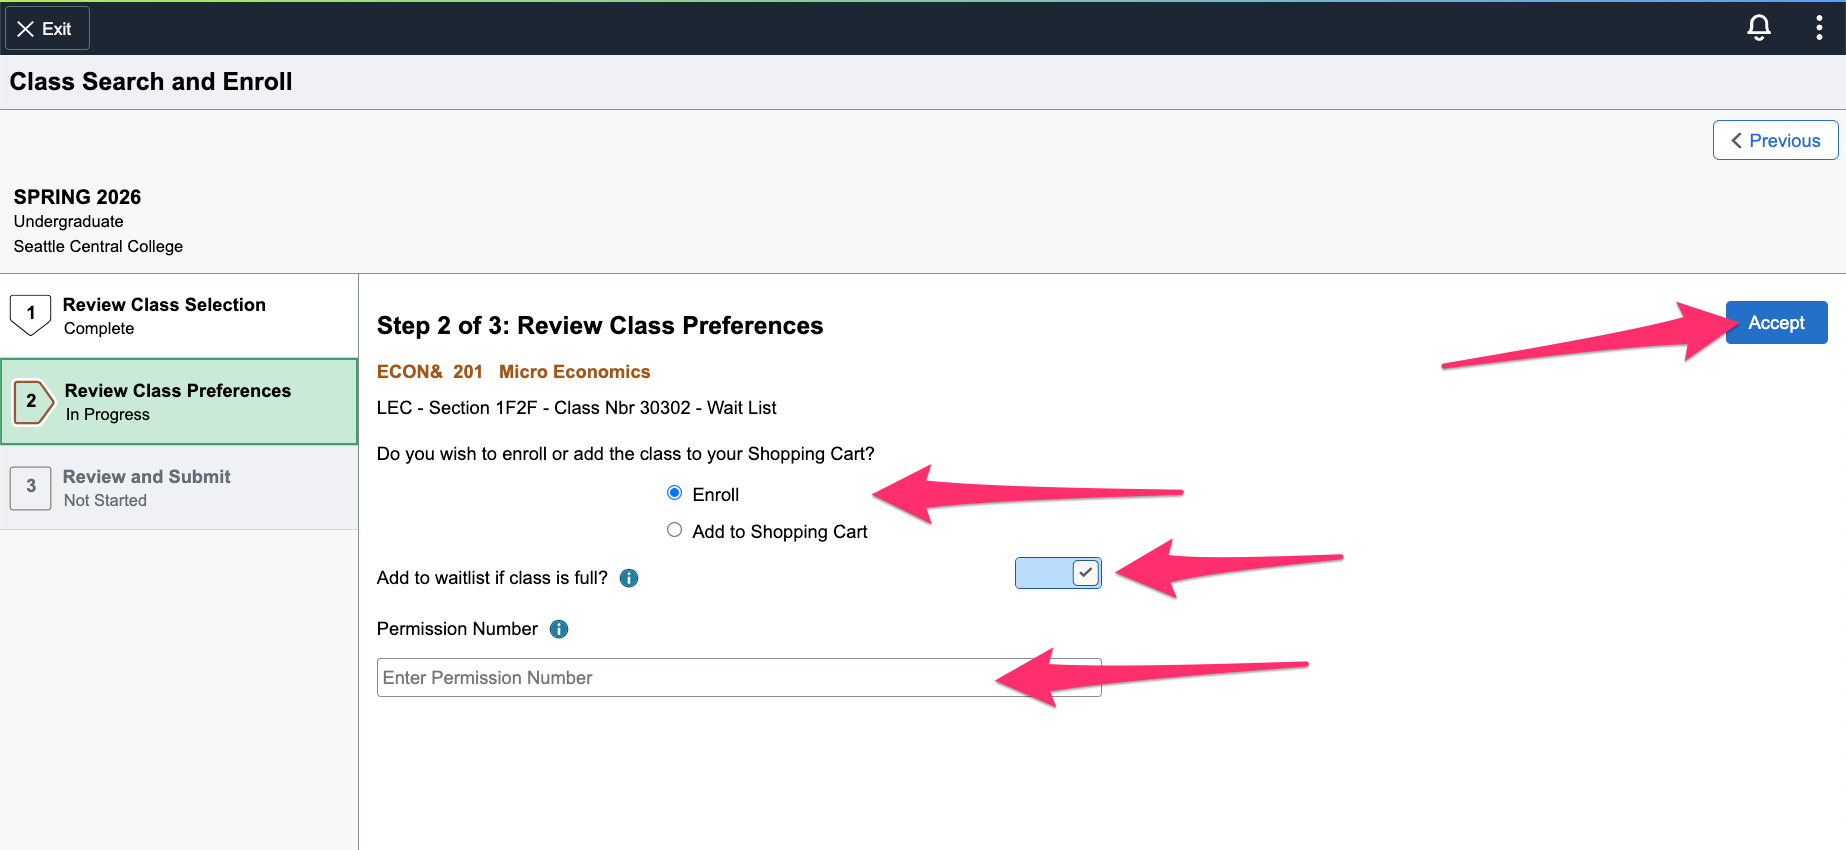
- In Review Class Preferences step,
- Indicate it you want to enroll or add to shopping cart.
- Adjust your waitlist preference.
- Enter a permission number here if you have one. If you're not sure you need one, just keep going.
- Click Accept.
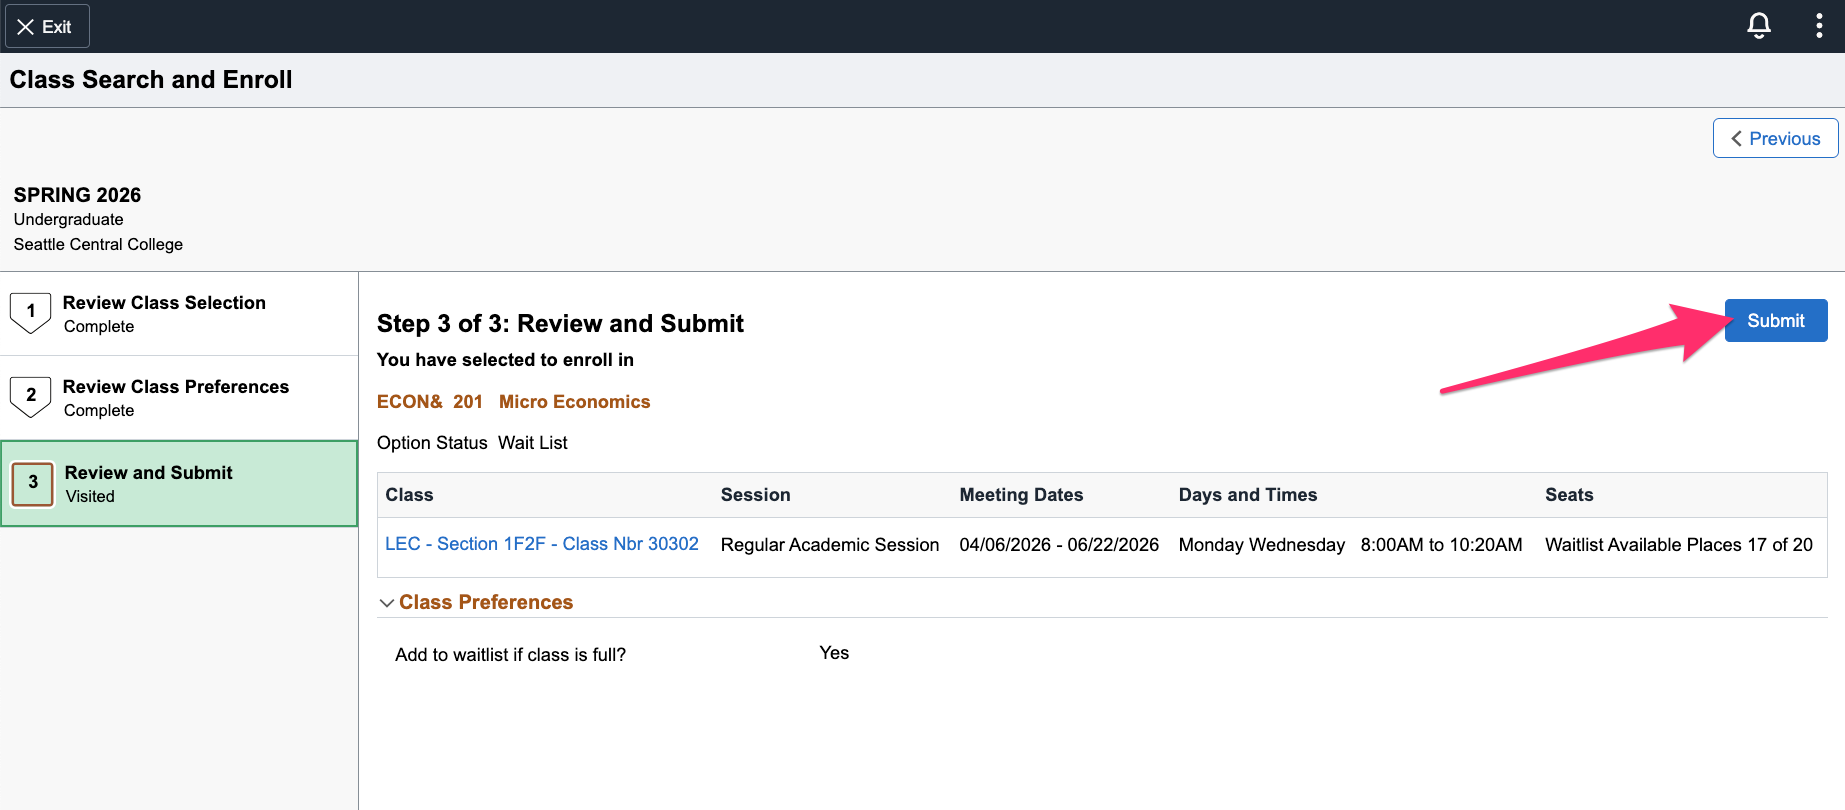
- Review your selection. If you need to make a change, click the Previous button at the top right. If everything looks good, click Submit.
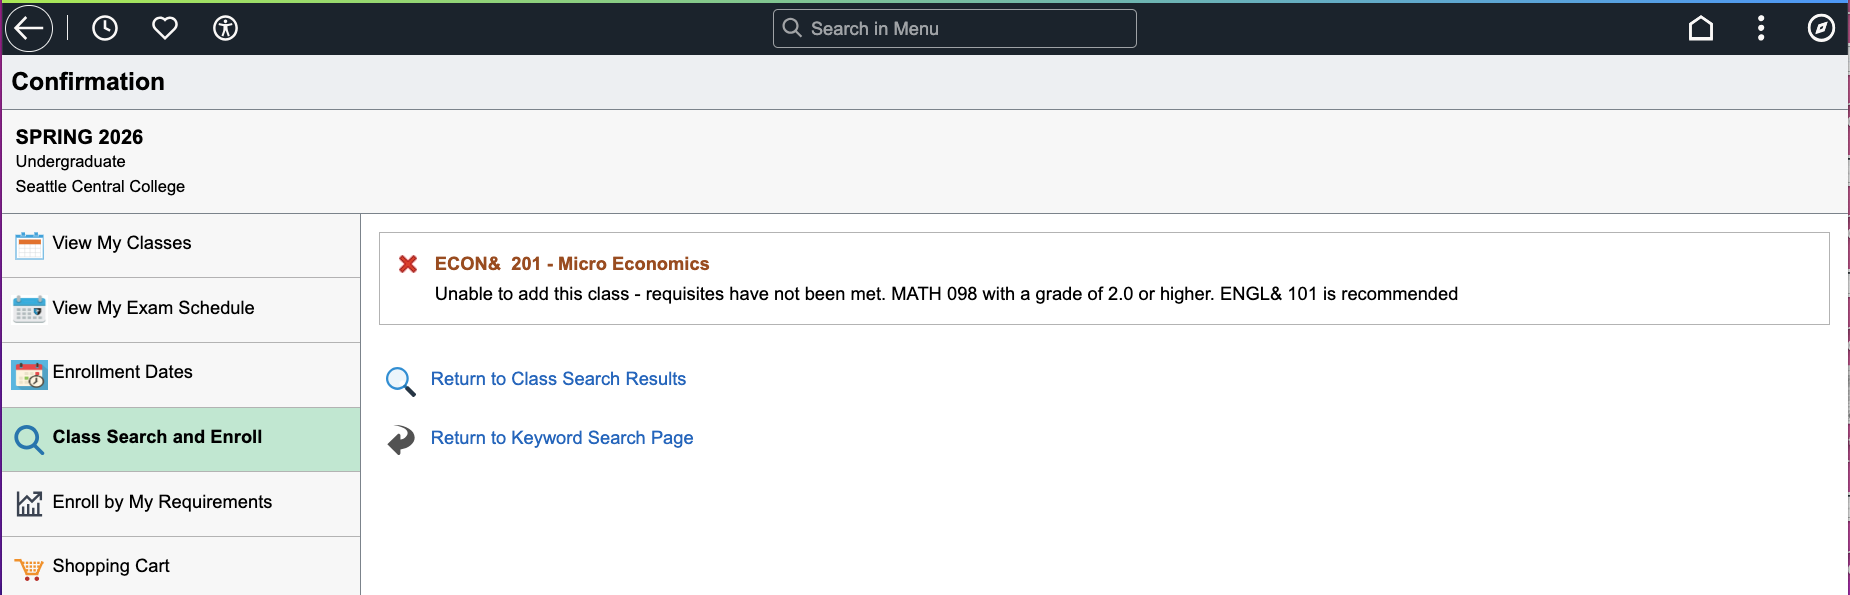
- The Confirmation page tells you whether or not you were enrolled in the class, waitlisted (with your waitlist position), or unable to enroll. If you were unable to enroll, review the additional information next to the error message.
Review the ctcLink Reference Center for these related topics:
- Enroll in a Class using a Permission Number
- Drop/Withdraw from a Class
- Enroll from Shopping Cart
- Join a Class Waitlist and Select your Back-up Class (Swap)
In addition to the guides and resources on this page, the ctcLink Reference Center's Student Homepage has guides for all WA state community and technical college students.
Last updated 5/15/2026